 Carbon monoxide detectors are imperative in any home. These devices save lives. However, many homeowners shy away from purchasing a carbon monoxide detector due to misunderstanding. Many people are under the assumption that installing such a carbon monoxide detector is hard and requires the help of a professional. This does not have to be a complicated task. It can be a do it yourself job. In fact, the information and steps below will make installation a breeze.
What is carbon monoxide?
Carbon monoxide is a poisonous gas which is derived of improper burning of certain fuels. It may be created from wood, coal, charcoal, kerosene, heating oil, natural gas, or propane. This gas is dangerous and hard to detect without a proper carbon monoxide alarm. The fumes are without color or odor.
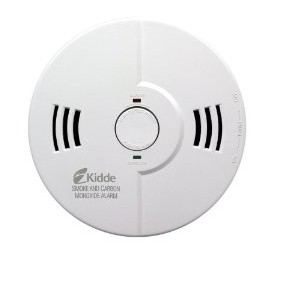
What is a carbon monoxide detector?
This is a life saving device which is similar to a smoke detector. However, it will alert home occupants of the presence of carbon monoxide with in the dwelling.
What are the symptoms of carbon monoxide poisoning?
Carbon monoxide symptoms can range form mild to severe. If you feel you have been exposed to these toxic fumes seek medical attention. Here are some possible symptoms to watch for.
• Shortness of breath or difficulty breathing
• Sudden feelings or tiredness or unexplained fatigue
• Nausea
• Feeling light headed or dizzy
• Headache
More severe symptoms of carbon monoxide poisoning may include:
• Harsh vomiting
• Mental confusion
• Passing out
• Poor coordination
Choose the right carbon monoxide detector for your home
There are two basic types of detectors to choose from. You may go with a simple AC plug in model. You may also opt for a battery operated detector. If you choose the battery operated version make certain to test battery strength often. As well, keep in mind that many plug in detectors fail with power is outages. Some do have a battery back up. These are always a good option.
[phpzon keywords=”carbon monoxide detector” num=”4″ country=”US” trackingid=”diy-do-it-yourself-20″ templatename=”default” paging=”true”]
How to install your carbon monoxide detector
Installing a carbon monoxide detector is not complicated. This can be done with ease if one knows the correct steps to take. Below are steps which will make installation an easy process.
Before beginning installation you will need to gather some supplies. Here are the things you will need to install your carbon monoxide detector.
• Carbon monoxide detector
• Screwdriver
• Pencil
• Wall Punch
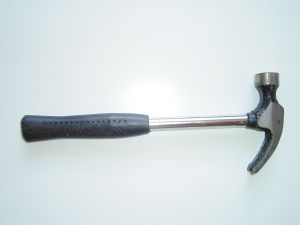
• Hammer
• Batteries
Step 1
The first step is to choose which detector you will be using.
Step 2
Next, you will need to choose a location for the carbon monoxide detector. Choose a location which is not near any heating or cooking source. It is best to space the alarm at least 15 feet from such areas. As well, make certain the alarm is free of debris and any type of covering such as curtains or drapes.
Step 3
Determine if the detector is battery operated of AC plug in ready. Plug in detectors need simply to be plugged in. However, battery operated units will require a bit more work.
Step 4
Mark the installation spot. Use a pencil to place a mark on the wall where the detector will be placed. Hold the base of the carbon monoxide detector to the wall. Darken in the screw holes with your pencil. This will leave circles on the wall where the screws should be placed.
Step 5
Take care to make holes in the wall where the pencil dots exist. This should be done using a wall punch. Make certain the holes you create are no larger than the screw anchors. They should fit tightly.
Step 6
Take a hammer and tap the screw anchors into the wall.
Step 7
Screw the base into the wall.
Step 8
Place a new battery inside the detector.
Step 9
Secure the detector to the wall.
Step 10
Test the batteries inside the detector. This will ensure that the unit is properly working. As well, it will allow you to became familiar with the alarm sound.
Your new carbon monoxide detector is now installed and operating properly. Installation was easy and performed with great success. You did not need the help of a professional. Your home is safe and your family is protected from the harmful and poisonous effects of carbon monoxide. You should be proud of the job you have accomplished.


